


Common glaze issues – how to troubleshoot step by step
Bubbles in the glaze? Glaze that cracks, flakes off, or turns the wrong color? Here we go through the most common glaze problems and how to avoid them.
Introduction
Most people who work with ceramics encounter glaze problems at some point. The result is not what was expected – the color changes, the surface bubbles, or the glaze cracks after firing.
Often the cause is not a single major mistake, but small variations in temperature, application, or materials. In this guide, we help you identify the cause and work more methodically before your next firing.
Step by step – how to troubleshoot
1. Check the application
How thickly has the glaze been applied? This is one of the most common causes of unexpected results.
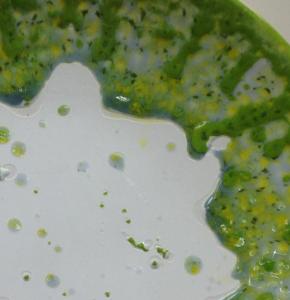
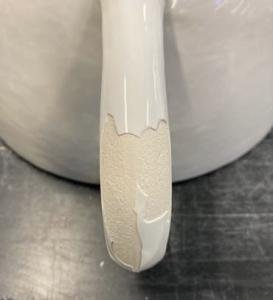
A layer that is too thin can produce pale colors or missing effects, especially with effect and crystal glazes. Applying the glaze too thickly can instead cause bubbles, running, or the glaze pulling away from the surface (crawling).
Effect glazes often require 3–6 coats to develop properly. The number of coats also depends on how much glaze is loaded onto the brush, which is why it is important to test on a clay strip or test tile to see how your particular application affects the result.
2. Ensure the correct temperature
Small temperature differences can create large visual changes.
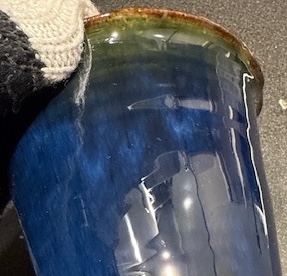
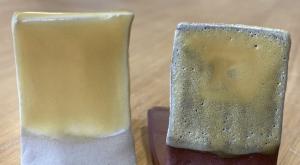
If the temperature is too low, the glaze may look matte or unfinished. If the temperature is too high, the color may change (for example, purple pigments can turn blue if fired too hot), bubbles can form, the glaze can run, or it may begin to “boil.”
If the result suddenly differs from previous firings – despite using the same settings – it may be worth checking the kiln’s actual temperature using cones (Orton cones).
3. Review the compatibility between clay and glaze
If the glaze:
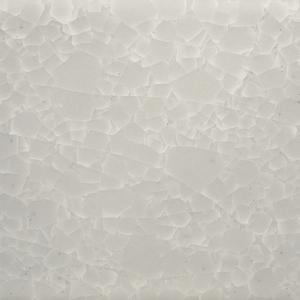
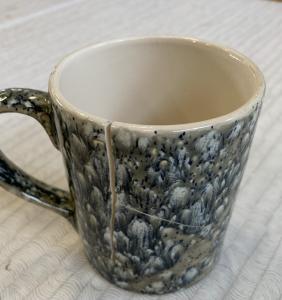
- Crackles heavily
- Flakes off the edges (shivering)
- Produces clicking sounds after firing
- Causes mugs to leak
…the problem may be that the glaze and clay are not compatible.
All glazes have a coefficient of expansion that must work together with the clay. If they do not match, tension occurs in the material. Unfortunately, this cannot be repaired afterwards – you will need to change the clay or the glaze and test a new combination.
The clays we sell are compatible with our glazes unless otherwise stated for the specific clay or glaze.
4. Check the condition of the ware before firing
Many problems arise before the piece is even placed in the kiln.
Is the piece completely dry? Is there dust on the surface? Has it been bisque fired correctly?
Moisture or trapped air in the clay can cause pieces to explode during the bisque firing. Dust or grease from hands can cause the glaze to pull away from certain areas during glaze firing. It is recommended to wipe bisque ware with a lightly damp sponge before glazing.
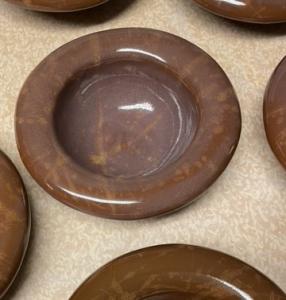
Common glaze problems
- Bubbles in clear glaze is often caused by applying the glaze too thickly, the glaze still being damp when the kiln was started, firing at too high a temperature, or a bisque firing that was too low.

- Glaze pulling away (crawling) is usually caused by glaze applied too thickly, two glazes from different brands repelling each other, dust, grease, or uneven application.
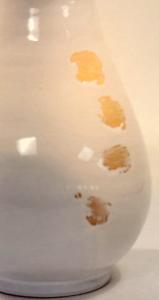
- Glaze not visible may occur if the surface was touched with unclean hands during application (grease from fingers).
- The color does not match the image may be due to too few coats, substances in the clay (e.g. iron), or a firing temperature that differs from the recommended one.
- Glaze flaking after firing (shivering) is a sign that the clay and glaze are not compatible.
- Crackle not visible often occurs because crackle glazes need to be applied slightly thicker, and the cracks become visible only after color or ink is rubbed into the surface after firing.
- Cracks / unwanted crackling / broken ware is a sign that the clay and glaze are not compatible.
- Pinholes / small holes in the glaze surface is often caused when glaze is applied on iron-rich clay, which can also affect the glaze color.
- Milky film may occur if too much clear glaze has been applied to the piece.
How to prevent glaze problems
- Always make test tiles when using new combinations of glaze or clay
- Document the number of coats and firing temperature
- Check the kiln temperature with cones if you are unsure
- Allow glazed pieces to dry completely before firing
- Avoid mixing materials from different suppliers without testing first
- Ensure dipping glazes have the correct density
Working systematically reduces the risk of unexpected results.
Summary
Most glaze problems are caused by three factors:
- Application
- Temperature
- Compatibility between clay and glaze
By adjusting one variable at a time and testing methodically, you gain better control over your firings – and more predictable results.